Sharpening your Images – Advanced Techniques
If your camera has the ability to output raw files and if you are serious about your photography, this Photoshop tutorial is for you.

In the last issue we had a look at the Unsharp Mask filter. This is the standard technique for image sharpening and you’ll find this filter in every image editing program.
If you shoot in JPEG, you normally don’t need to worry about sharpening. If your images look a bit soft, you can dial up the sharpening in your camera. If your photos look over-sharpened, which shows up ugly halos around sharp edges, you need to reduce the sharpening. Nowadays most images are viewed onscreen – you only need to make sure that they look nice and crisp. If you want to bring your images onto paper, you’ll find that they will need some extra sharpening to match the look on your monitor.
Raw Files and Sharpening
If your camera has the ability to output raw files and if you are serious about your photography, then you should consider taking this option.
The camera won’t do any sharpening – it is fully under your control. Of course, you don’t need to sharpen every image individually, because the raw conversion is run as a batch process and the converter will apply some sharpening by default. But it puts you in the driver’s seat; you don’t need to accept what your camera thinks is the best sharpening and you can tweak your shots individually.

Switch the preview to 100% to get the most accurate picture. You can always press the spacebar and move around the image with the mouse.
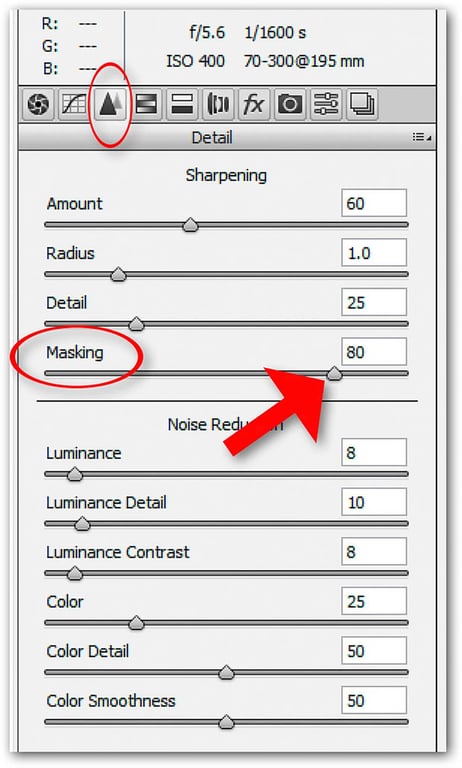
The ‘Amount’ setting works similarly to the Unsharp Mask Filter (USM), controlling the intensity. The default value of 25 is on the low side, if you use the masking option, which I highly recommend. The ‘Radius’ slider has a range of 0.5 to 3.0. Note that USM in Photoshop offers you a much larger playing field if you want to use sharpening creatively. A value of 1 is a good starting point. The ‘Detail’ slider controls the level of detail Camera Raw brings out. For most images leave it at around 40.
The ability to use a mask for sharpening turns this tool into something really useful. Leave the slider on 0 and everything gets sharpened. Push it up towards 100, and the sharpening is only applied to edges. Thankfully, Adobe lets us have a preview of the mask: press the Alt button while using the slider and you will see what is getting a dose of sharpening. You can zoom out and see what’s happening to the entire image. After setting the mask, I recommend that you go back to the 100% preview for fine tuning the other sliders.
The Smart Sharpen Filter
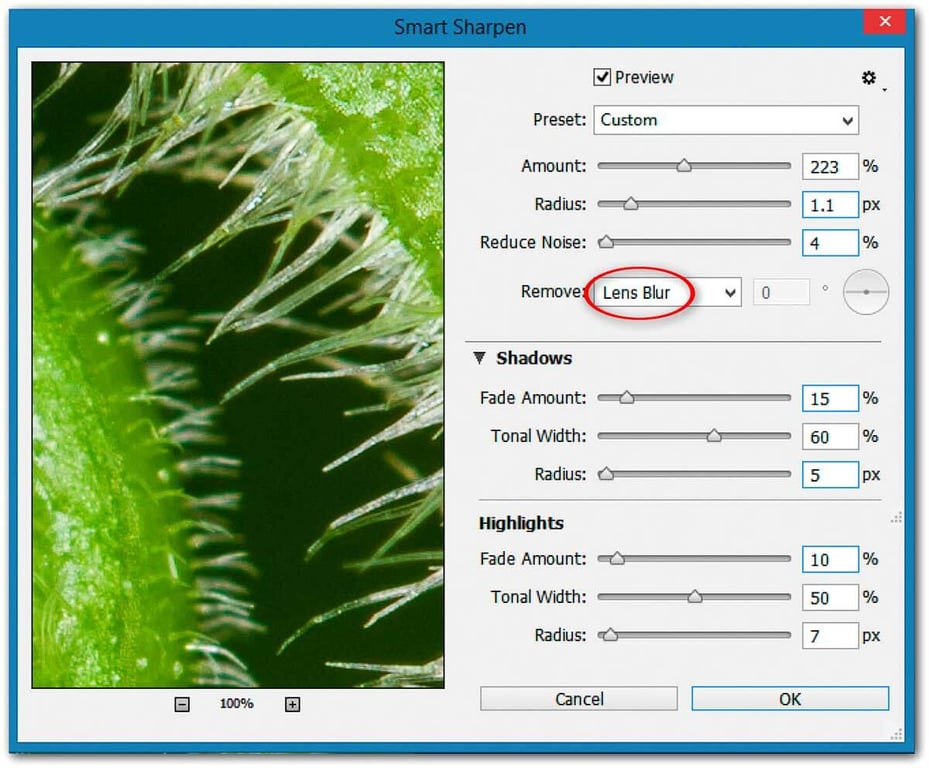
With Photoshop CS2, Adobe introduced a new Smart Sharpen tool. You’ll find it under Filter > Sharpen > Smart Sharpen.With Photoshop CS2, Adobe introduced a new Smart Sharpen tool. You’ll find it under Filter > Sharpen > Smart Sharpen.

Have a look at the three options under the ‘Remove’ menu. ‘Gaussian Blur’ works essentially the same way as USM. ‘Lens Blur’ is the option you want: it uses a different sharpening algorithm that attempts to differentiate between actual edges and image noise. In contrast to Gaussian Blur, Lens Blur sharpens the midtones more aggressively than shadows and highlight areas. This algorithm also does a much better job of controlling the width of the halo along high-contrast edges.
Next you need to optimise the actual sharpening process with the three top sliders. The default amount of 200% is a good starting point. In my experience, values between 150 and 300% work best. The Radius controls the halo around high-contrast edges. It will depend on image size and the amount of detail in your shot. Experience will help you nail down the right setting for every individual image. Start with a radius of 1 and increase it until you notice halos coming up around the finer image detail. Very small images, for example for websites, will need a radius setting of less than 1. Basically, the controls are very similar to the old USM filter, except for the missing ‘Threshold’ slider.
The ‘Reduce Noise’ slider is a new addition to Smart Sharpen in Photoshop CC. It’s quite useful for cleaning up splotchy colours or grainy details coming up with aggressive sharpening, particularly in regions of softer detail. Then there is also an advanced section which allows you to control the amount of sharpening in the shadows and highlights. The ‘Fade’ sliders let you reduce the sharpening applied to shadow and highlight areas. For example, if you want Photoshop to do a bit less sharpening in the shadows, set the Fade Amount slider to 25% or so. If you want no sharpening to happen in the shadows, push the slider all the way up to 100%. The same goes for the highlights.
Other Sharpening Techniques
All the methods described so far work on the principle of the USM filter. This filter looks for edges and enhances them to give you the impression of a sharper image.
But what happens if there are no sharp edges in your photo? The USM filter won’t work, but you can use a technique called ‘High Pass’ sharpening with stunning results.
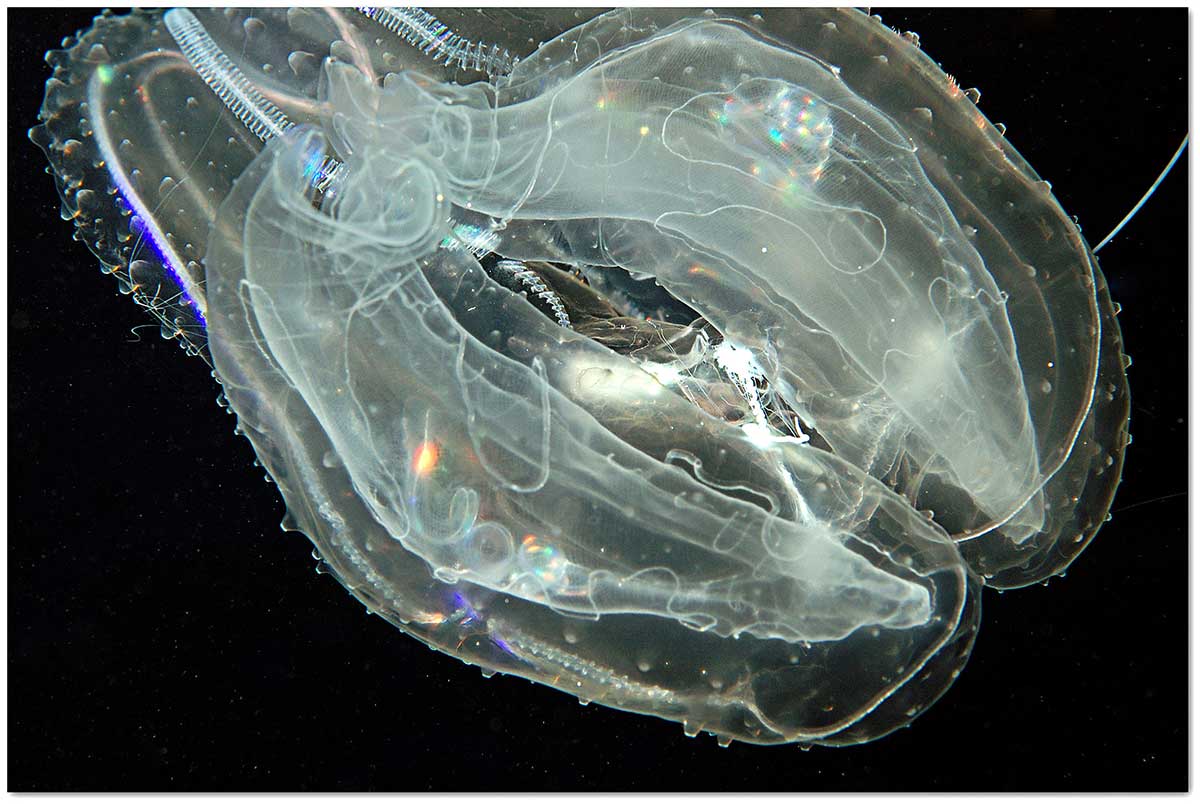
You can apply this method to any image, but it is particularly helpful if there are no well-defined sharp edges the USM filter can latch onto. Animal photography often falls into this category, especially shots taken underwater. In image 3, I use a jellyfish as an example.
Start by making a duplicate of the current image layer, then apply the High Pass filter to the duplicated top layer (Filter > Other > High Pass). I used a radius setting of 10 for this particular image. Then change blending mode of this layer to ‘overlay’, ‘soft light’ or ‘hard light’, depending on the effect you want to achieve. Finally, decrease the opacity of the top layer if the sharpening is too strong.
You can find many more sharpening techniques and tricks in various tutorials. I can highly recommend the book Real World Image Sharpening by Bruce Fraser.


